- Mr. Jack-o-lantern
- Mr. Jack-o-lantern
Is very round and fat.
He has a yellow candle
Tucked underneath his hat.
It makes his face look scary (cheery)
And very, very bright
When he winks and smiles at me
On spooky Halloween night!
--Alene Dalton, Myriel Cluff Ashton and Erla Young
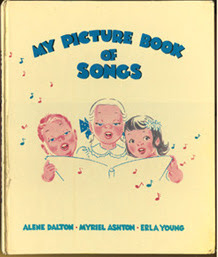

This was one of the Halloween songs we would sing at Family Home Evening in October when I was little. The other was Halloween Cat which I may post later. They both came from a book called My Picture Book of Songs with pictures by artist Erla Young published in 1947. for those interested, there are several copies available for sale online, and it seems that Deseret Book published a 50th anniversary edition. Provo Library also has a copy. I really liked the songs, but thought that there was something not quite right about the pictures. The kids were sooooo cheerful and bright eyed and rosy cheeked that it was kind of creepy (in a horror movie about baby dolls sort of way).
Lots of people have told me how cute the pumpkin hat is, so I thought I'd post directions so that anyone else who wants to can make one.
I used a size J-10 (6.0 mm) hook and Vanna's Choice Lion Brand yarn in Rust. The website says it's a Weight Category: 4 - Medium: Worsted-weight, Afghan, Aran Yarn Solids: 3.5 oz/100g; 170 yd/156 m balls. All stitches in this pattern are chaining or single crochet. It takes me a couple of hours (around 2 1/2 to 3) to make each hat.
To make each sections, chain 10, add one to turn,

then single crochet back and forth 8 more times (for a total of 9 rows including the chain). It should be roughly square.

When turning the next corner, don't chain one to turn, just go into the second stitch thereby decreasing one. Continue in this manner so there are 9 stitches on this row, 8 on the next, and so on down to one stitch that you cut the yarn and pull it through to make a knot.
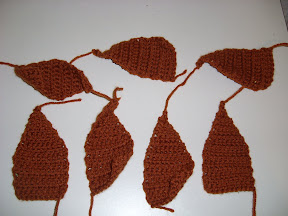
Make 7 or 8 sections. More sections make a bunchier hat. I made 7 to fit my 9 month old daughter. You could also adjust size by making more stitches per section -- though this will also make the sections taller.
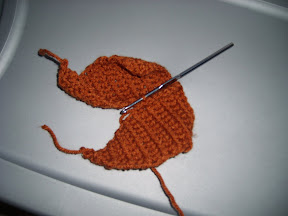
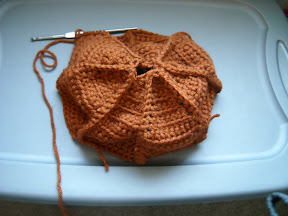
Attach two sections together by doing a single crochet through both along one edge. This will make a prominent ridge when you lay them flat,

and a valley on the other side.

You want this. Also, when you get to the angled part, feel free to make it tight, and use fewer stitches so that it curls a little. Both of these things contribute to the pumpkin shape. If you can manage to stitch over the loose ends, they'll stay hidden better than if you weave them in later with your hook.

Continue stitching around the point of one section and down the other edge with a third segment. Make sure all the ridges will be on the inside of the hat (it's easy to do it the wrong way if you're not paying attention). When you get to the bottom, cut the yarn and pull it through.
Attach all the sections in this manner till you've completed the circle. If you've planned well, you'll be at the bottom of the hat, and can start stitching around the bottom without cutting the yarn.

Make one row around the bottom, evening out the seams and covering up loose ends. Mark where you begin with a scrap of yarn or safety pin so you'll know that you've completed a row even though we'll just continue around in a spiral.

The next row you'll be decreasing. Skip one, then stitch two, then skip one, then stitch two. You get the idea. Essentially you're only paying attention to two out of every three stitches.
Try the hat on your baby after the decrease row. If it's loose, decrease again. You can skip fewer stitches if it's almost small enough, but I wouldn't skip more than one in three. Just add another decrease row if it's still too big.
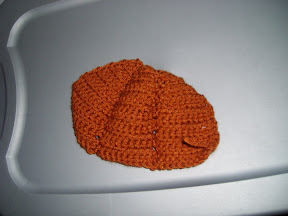
Do about four rows of regular single crochet. When you're finished, weave the end into the next four stitches or so to make a nice even edge, then weave the rest into the stitches on just the inside of the hat so it doesn't show.

There's a roundish hole in the center top of the hat where all the points meet. For the stem, use green or brown yarn to stitch around the inner edge of the hole. I like to stitch this part inside out so that the spiral ridges are on the outside when I'm done. Go around once or twice to make the stem, then start decreasing -- skipping one stitch in three for the next two rows, then every other stitch to make a point. clip the yarn and weave it in on the inside, then turn it right side out so it pokes out the top of the hat.

I find I can make two hats from a ball of yarn, though sometimes it runs a little short. If you use the same green or brown as the stem to do the last two or three row on the bottom of the hat (after the decreases), then it makes a nice border, and saves on the orange yarn.
Here are some pictures of Elizabeth wearing her hat. Notice how different it looks depending on how far back it's pushed, and how much of the bottom band shows.


That is so cute! I love it!
ReplyDeleteI'm pretty sure we had that book. :)
Great directions. I think someone just beginning to understand crochet could follow those and be successful.
ReplyDeleteAnd I agree that Erla Young's children were unnatural and a bit disturbing. Mom's were better ; )
Funny how strange the internet is...I was thinking about you the other day and I remembered that Nancy forwarded an email you sent to a few of us. I hope you don't mind me checking your blog. I read a few posts and you are definitely the Karen I've missed!!
ReplyDeleteI love the hat and am thinking about making one for my daughter as well =) Yes, I too am a mommy.
Wish you the best!
OH...and its Linnette =)
ReplyDeletei want to make one....i'm more of a knitter but i might have to give this a try.
ReplyDeleteHow cute! I love how it has the ridges and everything. What a great idea.
ReplyDeleteHi there, thought I would leave you a message. Love the pumpkin hat!! I will have to try and make one myself
ReplyDeleteThe hat is so clever, and looks great on her. And I agree with Helena, I'm pretty sure we had that book too.
ReplyDeleteThank you so much for writing out the name and title of the song book. I have been using those songs throughout my career as a professional puppeteer, but I wanted the music to share them with others. Also, I hate to rely on my memory alone. Couldn't remember the name of the book, but some of those illustrations are burned into my brain cells. The songs are still wonderful children's songs. When you need a song about President's Day -- you have one! Thank you again.
ReplyDeleteAnd your baby is absolutely adorable in the pumpkin hat.
I found the book while cleaning out the basement at Ahlstroms! I had the words wrong (though I like my version better).
ReplyDeleteMister Jack O' Lantern is very round and fat.
He has a yellow candle, lit right beneath his hat.
It makes his face look happy and very, very bright
When he winks and smiles at me on spooky Halloween night.
This is wonderful, thank you so much for posting how to make this hat! I'm almost done with a pumpkin hat I'm making on the fly, but I think I'll try this one too because it looks so awesome :)
ReplyDelete-Laura H.
Love it! I made one for both my daughters and I added it to ravelry.com :)
ReplyDeleteWould you consider selling one to me, adult size? I don't know how to crochet.
ReplyDelete@Denise to make one, I'd need a head measurement, about $10 in yarn (unless you want nasty read heart junk) and about 4 hours of work. For friend's I make crafts for the cost of supplies, but for someone I don't know I charge $20 per hour. If you want to pay $50 for a pumpkin hat, I'll do it. Otherwise, you can find a friend to teach you crochet (many yarn stores will also happily teach you for free or hook you up with a helpful granny in your area). This is definitely a beginner level project. You could take my directions to your teacher and have one section done in about an hour. Then you could go home and make the other sections and take them back for some help in finishing.
ReplyDelete